Reference
Create a Client
Click "New Client" under the "Client" drop down menu.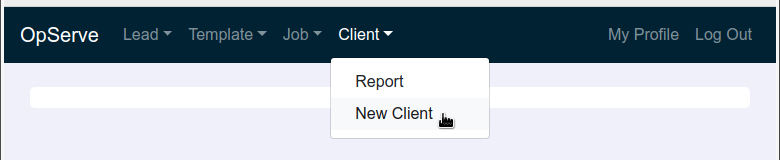
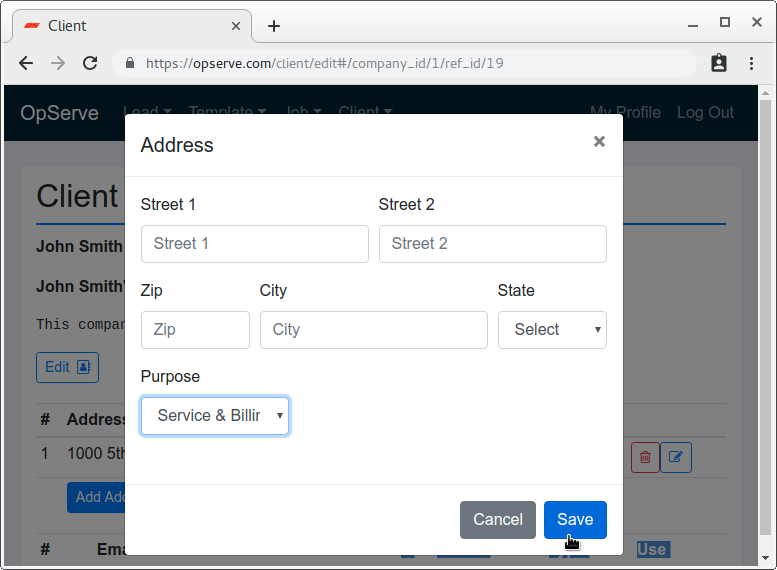
Fill in your client information and click "Save".

Most important is adding a service address. Click "Add Address", fill in address details, and make sure to select "Service" or "Service & Billing" from the "Purpose" drop-down selector. Follow similar, self explanatory steps for entering email and phone for your client. You can add multiple addresses, emails, and phone numbers.
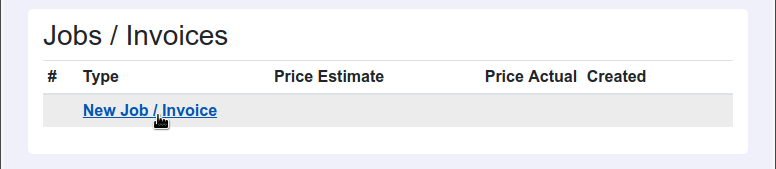
Click "New Job / Invoice" to create a new job (this starts the invoice too).
Click here for instructions on how to create a job.